
That document will guide you to put into place the monitoring process of JAAK using our white-branded solution (white-label), also known as JAAK KYC Web. That method is the fastest way to integrate a flow from KYC complete and optimized as JAAK provides the graphic interface for the end user.
The goal is simple: to generate a unique login and direct your user to JAAK KYC Web, a webapp to complete your verification.
That diagram shows our implementation flow through White Mark, an ideal low code solution for quick and secure integration. We generate and send a unique link to the user, we guide them through our customizable web interface to complete the process of KYC (document capture, liveness detection, etc.) and at the end, we re-directed it back to your site. Asynchronously, your system receives final results through a Webhole, enabling you to make business decisions automatically and effectively.
Step 1: White Dial Setup
Before you start, you can customize the looks of the check flow to align with your company's visual identity.
- Access the Platform JAAK.
- Sail to Section of "Adjustments" On the menu.
- Enter "Adjustments," select the option "My company".
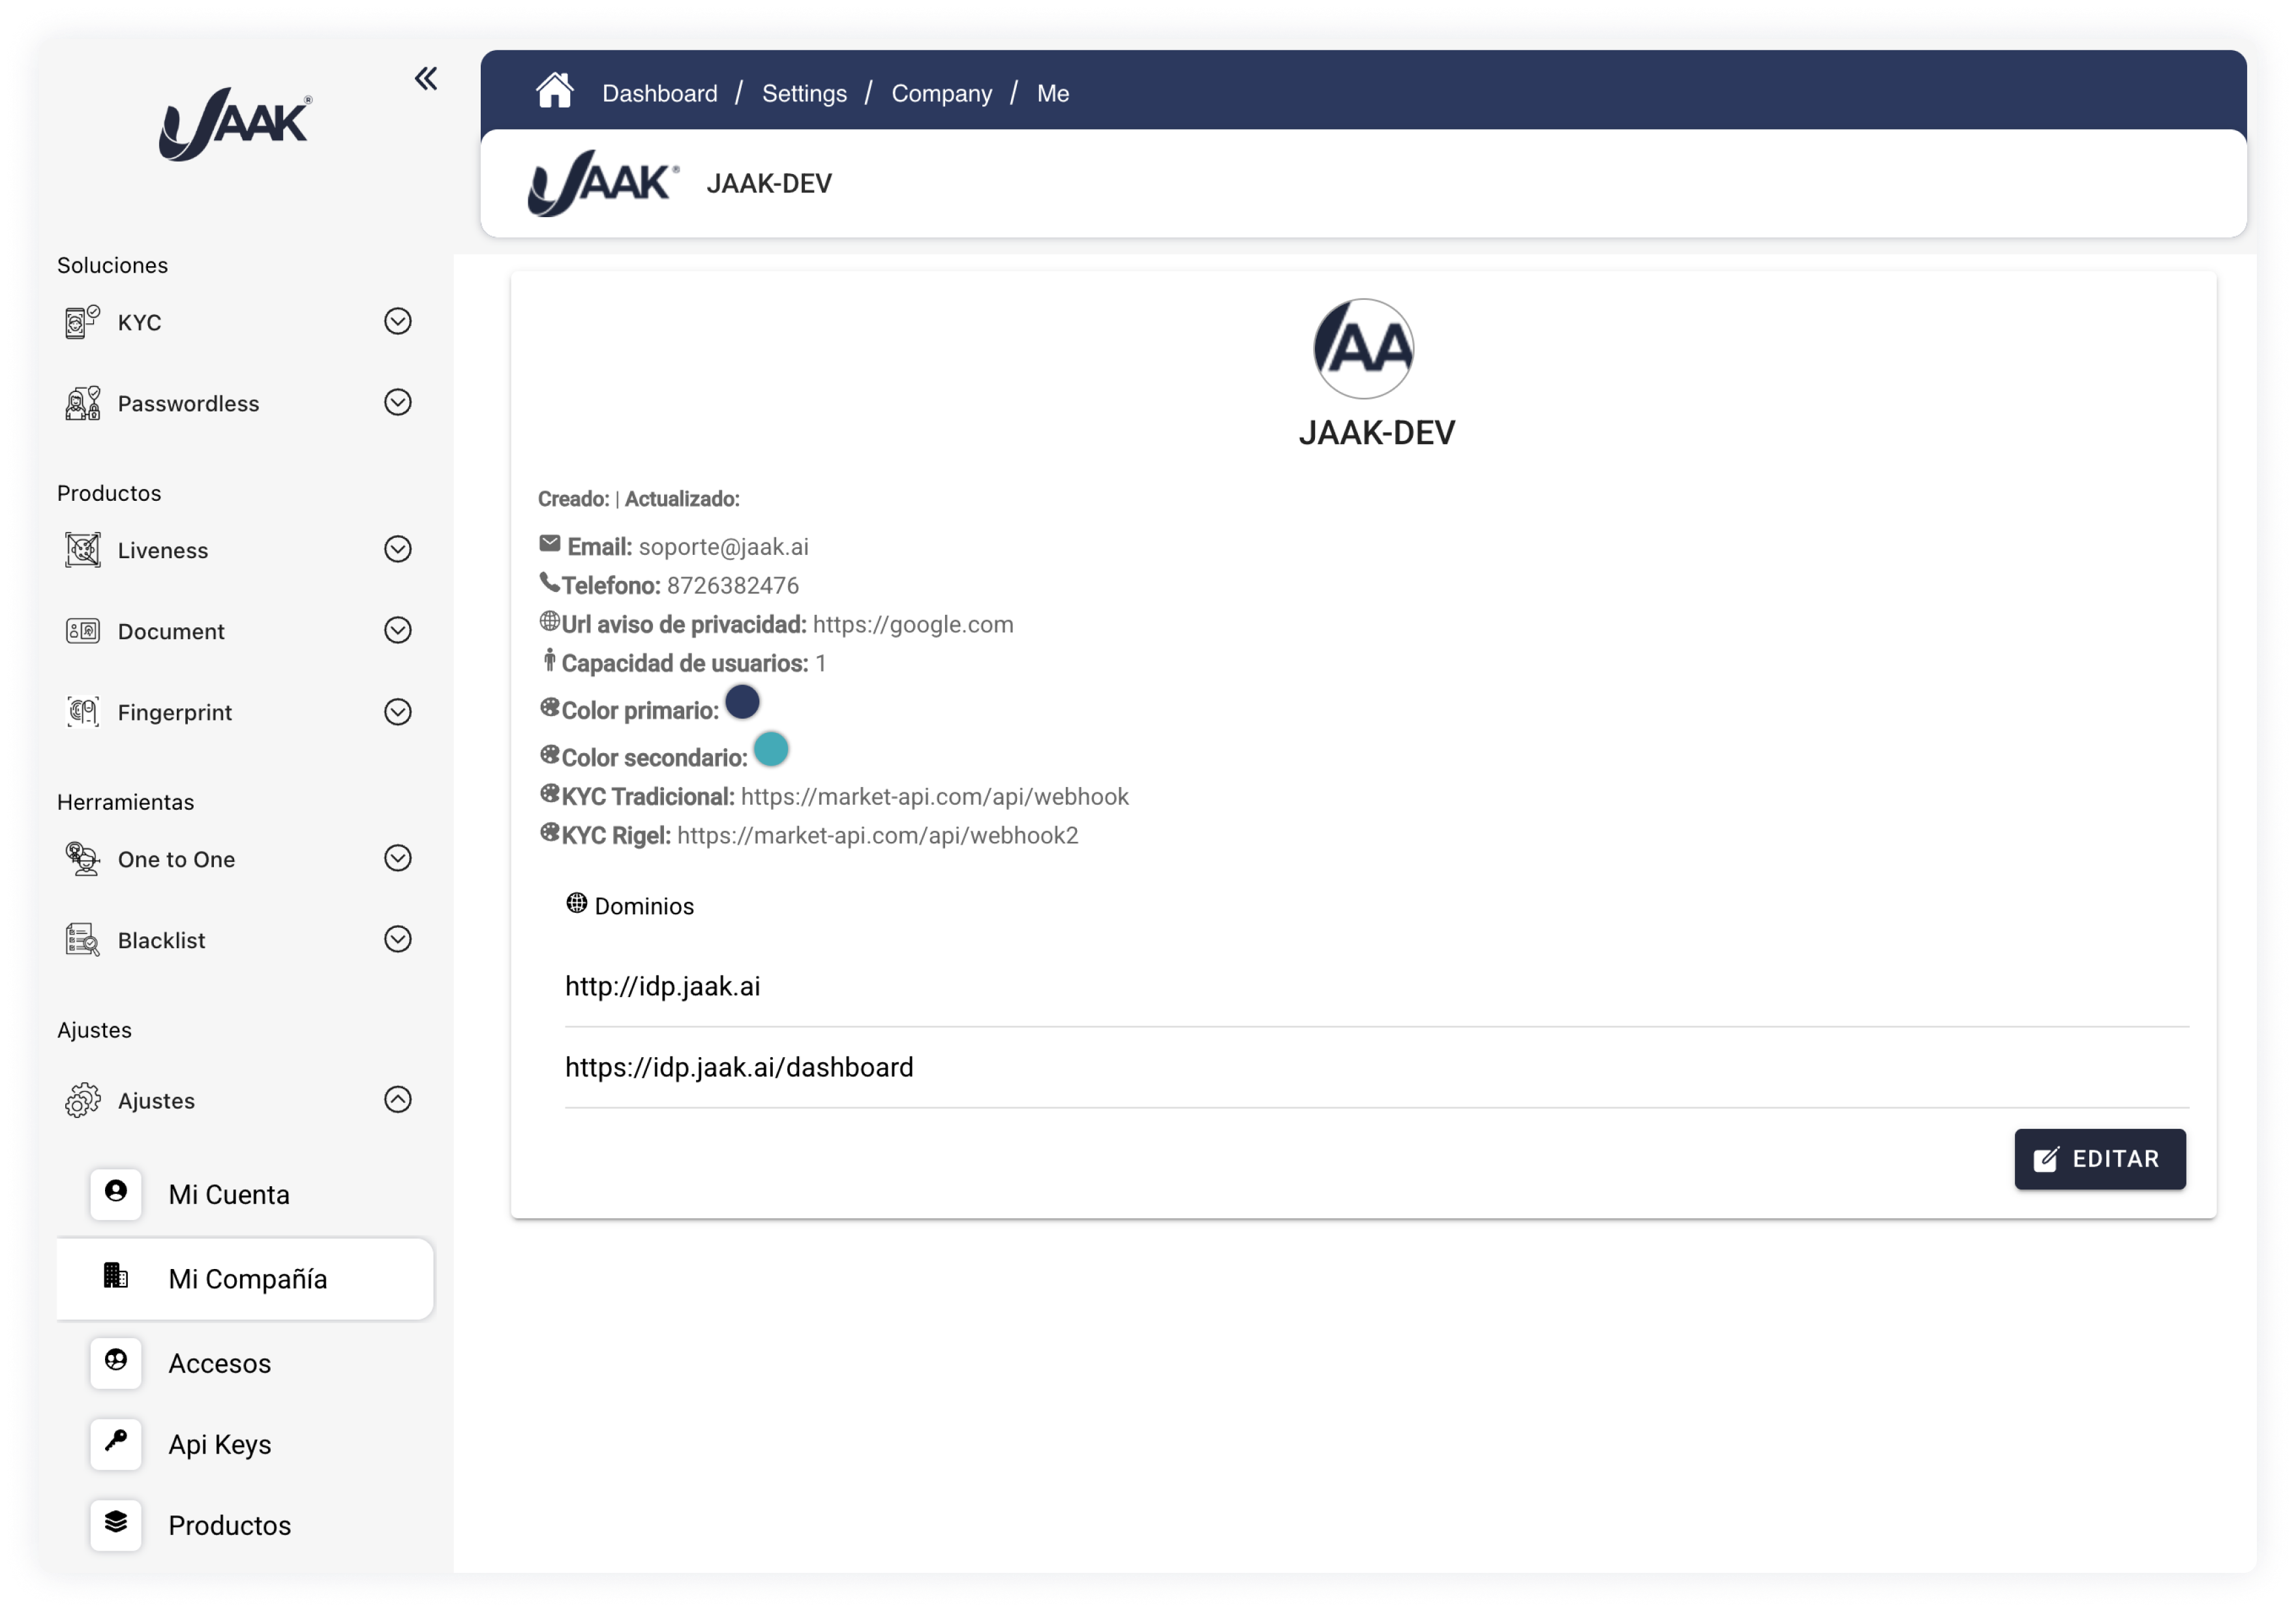
- Click the button "Edit" That appears at the bottom right corner.
- A form will be opened where you can:
- Change name of company.
- To upload or update your image logo.
- Define your Primary and secondary colors.
These adjustments will be reflected in the interface your end users will see.
Step 2: Establishment of the Session KYC
Each user who needs to check his or her identity requires a Session KYC When creating a session, you will have to send an URL to your user. You have two ways to create this session:
A. Way API (Recommended method for automation)
That method is ideal for integrating sessions directly into your system.
- Get your API Key:
- Enter the Platform JAAK (
https://platform.jaak.aiorhttps://sandbox.jaak.ai). - Go to Section
Ajustes -> Api keysand generates a new key. Keep it in a secure place.
- Enter the Platform JAAK (

-
Realizes a call
POST: Send a request to the following endpoint to create the flow.
Call details APITo create Session KYC
POSThttps://api.sandbox.jaak.ai/api/v1/kyc/flowIt creates a new check session and generates a session URL with a unique Short Key.
Leaders
Parameter Type Description Authorizationstring You API Key with the "Beaner" prefix. Body (
application/json)Field Type Required? Description namestring Yes Name of person to conduct the meeting KYC. flowstring Yes Name that you can give to the Session KYC. redirectUrlstring Optional URL to redirect users at end of session. countryDocumentstring Yes Country code of document to be accepted (Alpha 3). flowTypestring Yes The type of KYC to be performed, by default used "KYC". verificationTypestring Optional Reporting method: "Whatsapp," "sms," "email" or "" (empty to avoid). verificationobject Optional Object containing the destination of the notification (phone or email) according to verificationTypeselected.
- Example of Request:
{
  "name": "Full Name of User",
  "flow": "OnBoarding",
  "countryDocument": "MEX",
  "redirectUrl": "https://www.tu-sitio.com/verificacion-completa",
  "verificationType": "email",
  "verification": {
    "EMAIL": "usuario.final@email.com"
  }
}
- Example of Request:
-
He receives the Session URL: The response of API He'll give you back a
sessionUrl. That's the main link where the end user will conduct the flow.-
Example of Answer:
{ "sessionUrl": "https://sandbox.kyc.jaak.ai/session/WIoGa8e" } -
Note: The
Short Keyare the last 7 characters of the URL (in this example,WIoGa8e).
-
Important information
The phone number sent to parameters "vertiation.SMSandvertiation.WHATSAFA"have to contain the national code, for example:
- +52 for Mexico
- +1 for Estados Unidos
B. From the Platform JAAK (manual)
- On the platform, go to
KYC -> Sesionesand click "To create new Session KYC".

- Complete the form with user information and Redirection Url.
- Save and copy the generated session URL.
Step 3: To target Flow User JAAK KYC
You have two ways to get the login link to the user:
-
Direct Redirection: It uses
sessionUrlobtained at the previous step and place it onto a button ("Check My Identity") inside your website or application for the user to start the flow. -
Automatic notification of JAAK: Can you set up the call API step 2 for that JAAK send the link for you through WHATSAPA, SMS or EMAILTo do this, figure out the fields
verificationType("WHATSAPP","SMS","EMAIL") andverificationwith appropriate information.- Important note: The issuer of these notifications shall always be JAAK. A custom sender cannot be set up as sending services (SMTP, META configuration, phone number) are property of JAAK.
Step 4: The User Complete The Process
Once at sessionUrl, the user will be guided by the JAAK To complete the following steps:
- Acceptance of terms, conditions and privacy policies.
- Give permission to capture his geolocalization.
- Take a photo of his paper's back.
- Take a photo of the back of the document.
- Record a short video of his face (liveness detection).
Step 5: Reporting and Results Consultation
At the end of the flow, the user will be redirected to the redirectUrl That you set up earlier to get back to a website or app.
To get an automatic notification that the process has been completed and check the results, you have two options:
-
Notification by Webhook (Recommended): To get an automatic notification from your server, set up a web hook:
- Go to
Ajustes -> Mi empresaat the JAAK. - Press the button "Edit".
- On the form, look for the subsection "Products".
- Add your endpoint URL to the field "KYC Webhole ".
- Go to
-
Email notification: Can configure an email notification directly from the Platform's options JAAK.
In addition, you can always check the details of each check manually in the Section KYC -> Sesiones from the platform.
And ready! With these five steps, you have implemented a robust and secure identity check flow.